How to keep a damage record in a body shop
How a body and paint shop records a car's condition with a diagram and photos, gets hidden damage approved after strip-down and closes the hand-over.

6 min read
On this page
- Why does a damage record matter so much?
- Recording damage at check-in, step by step
- 1. Walk round the car with the customer
- 2. Mark every damage on a diagram
- 3. Take the photos in the same order
- 4. Note the paint and previous repairs
- 5. Write down what's left in the car
- 6. Write up the job and get it signed
- How do you get damage found during strip-down approved?
- What should you check at hand-over?
- Common mistakes
- Damage records in Coudy Garage
A car comes in with a dented front right wing. The service adviser photographs the dent, writes up the job, and the customer leaves the car. Three days later, at hand-over, the customer walks slowly round the car and stops at the rear door: "That scratch wasn't there."
Maybe it was, maybe it wasn't. At check-in only the dent was photographed; nobody looked at the rest of the car. The argument drags on, and in the end the workshop fixes the scratch for free.
This happens a lot in body and paint work, because the job is all about the car's surface and every small mark matters. This post covers how to record damage at check-in, how to take the photos, how to get hidden damage found during strip-down approved, and how to close the hand-over.
Why does a damage record matter so much?
A damage record is the report, made together with the customer, of the condition the car arrived in. In body and paint work it protects both sides:
- It protects the workshop. For any mark pointed out at hand-over, you open the record instead of saying "it was already there".
- It protects the customer. They see clearly what condition the car is returned in and what they are paying for.
- It defines the job. Which damage will be repaired and which will be left as it is gets written down from the start.
Recording only the damage you'll repair isn't enough; every mark on the car should be recorded. The argument at hand-over usually comes from the panel nobody looked at, not the one you repaired.
Recording damage at check-in, step by step
1. Walk round the car with the customer
Do the damage check while the customer is with you. Show them every mark you find: "There's a scratch on the rear door, I'm noting that too." A mark you've both seen won't become an argument at hand-over.
2. Mark every damage on a diagram
Mark each damage on a vehicle diagram, on the panel where it is, and note its type: scratch, dent, chipped paint, crack, previous repair. Instead of a general note such as "scratches on the right side", write "right rear door, scratch". The panel name and damage type make it easy to look at the same spot at hand-over.
3. Take the photos in the same order
Use the same order for every car: front, front right, right side, rear right, rear, rear left, left side, front left, roof, interior. No panel gets missed, and anyone looking later knows where to find what.
Take a close-up of each marked damage as well. The wide shot shows the whole car; the close-up shows the mark itself.
4. Note the paint and previous repairs
Previously painted panels, colour differences, dull paint and rust all affect the result of the job. Write them down at check-in and tell the customer. Work done on top of an old repair can look like a new problem at hand-over.
5. Write down what's left in the car
Body work can keep a car in the workshop for days. Note what's in the boot, the child seat, the spare key. An item moved during strip-down counts as lost if it isn't on the record.
6. Write up the job and get it signed
Write which panels will be repaired, which replaced and which painted. Damage that won't be repaired stays on the record too, marked "not being repaired". The check-in is complete when the customer reads the record and signs it.
We cover the rest of the check-in form in the vehicle check-in form guide.
How do you get damage found during strip-down approved?
Damage found during strip-down should be approved by the customer item by item before work starts. Take off a bumper and you may find a broken mounting; open a door and you may find rusted inner panels. None of this can be seen at check-in, and the customer doesn't know about it.
The right flow is:
- Photograph the extra damage; the customer can't decide without seeing it.
- Add it to the work order as a separate item, with parts, labour and price.
- Send it to the customer with the photo and ask for a decision on each item.
- Do the approved items and leave the declined ones; the decision and its date stay on record.
A "fine" on the phone isn't enough. The customer may approve one item and decline another; a written, item-by-item decision makes the invoice right by itself. We explain how to keep extra work on a work order in detail in the work order guide.
What should you check at hand-over?
At hand-over, walk round the car with the customer once more, this time with the check-in record in hand. What to check is clear:
- Repaired panels: colour match, paint finish, panel gaps.
- Damage that wasn't repaired: show from the record that it is as it was at check-in.
- Items left in the car: see together that what was noted at check-in is still there.
- Work done: show that every item on the invoice, approved extras included, was done.
When the check is complete, the customer signs to say they have collected the car. The signature at check-in, the approvals for extra work and the signature at hand-over tell the whole story of the job from start to finish.
Common mistakes
- Recording only the damage to be repaired. The argument at hand-over usually comes from a panel nobody looked at.
- Taking photos at random. Without a set order, a missed panel goes unnoticed.
- Recording damage after the customer has left. A record the customer never saw means little to them at hand-over.
- Getting extra damage approved on the phone. An approval with no record turns into an argument over the invoice.
- Not noting previous repairs. The result of an old paint job looks like the result of yours.
Damage records in Coudy Garage
In Coudy Garage the check-in runs in four steps: service checks, the car's condition, the customer's complaints, and the parts and labour to be done. Damage is marked on a vehicle diagram and photos are added to the check-in; notes and items left in the car are recorded too. When the check-in form is printed, the damage and items are on it.
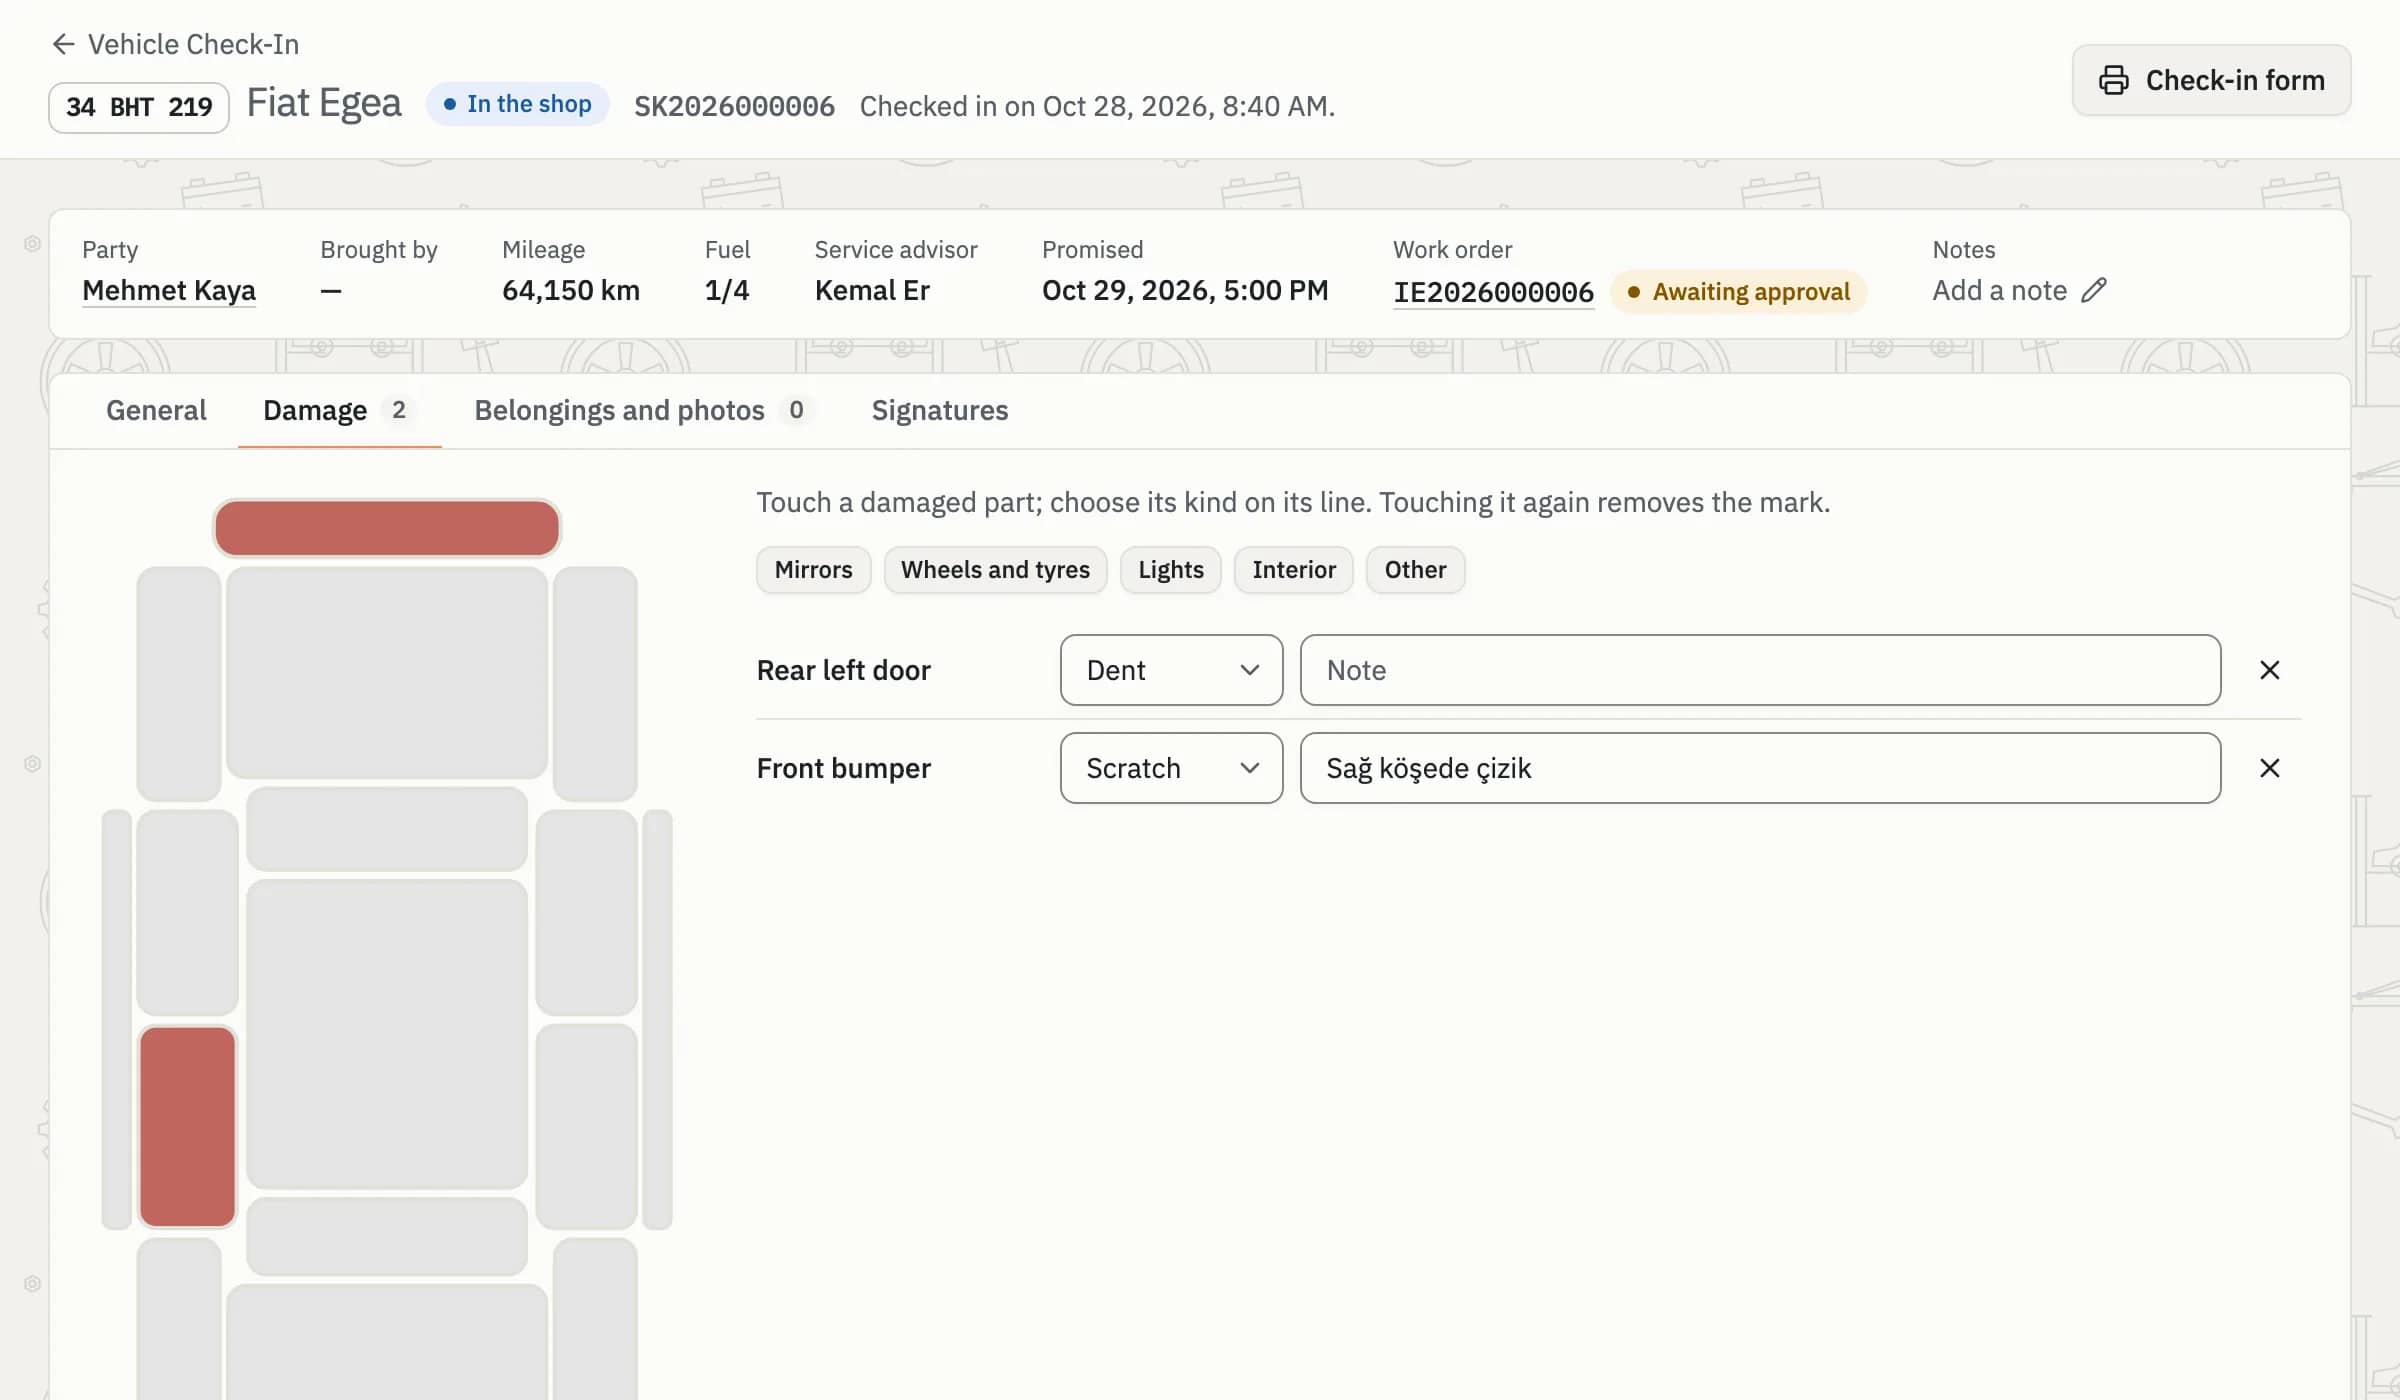
In Coudy Garage, damage is marked on the vehicle diagram and photos are added to the check-in.
The finished check-in goes to the customer's phone for signing; they read the car's condition and the work to be done and sign with a finger. During the job they approve or decline each extra item separately, and they sign the hand-over on their phone as well. For more, see the Service and Check-in and Signature on the Phone pages.